
Build and Test of 2 Open Source 3D-Printed Syringe Pump Designs


Overview and Scope:
In this post, we test the feasibility of 2 open source 3D-printed syringe pump designs. Syringe pumps are a common apparatus used in many medical and scientific fields. Syringe pumps allow diabetics to use convenient insulin pumps, allow anesthesiologists to administer careful dosages of sedatives to usher patients peacefully through surgery, and allow chemists to carefully control the addition of reagents during a chemical reaction. In this post, we construct the backbone of 2 syringe pumps using open source 3D-printing technology. We then utilize a stepper motor and Arduino to make a simple, manually controlled syringe pump. The original design was uploaded to Thingiverse by Linus Meienberg. The original upload can be found via the following URL: https://www.thingiverse.com/thing:2797132
Parts List:
Ender 3 V2 3D Printer
PLA (or any other filament of choice) - Used eSUN PLA PRO (PLA+) 3D Printer Filament, Dimensional Accuracy +/- 0.03mm, 1kg Spool, 1.75mm, Blue - https://www.amazon.com/dp/B01EKEMNRO/ref=twister_B095MTT7D3?_encoding=UTF8&psc=1
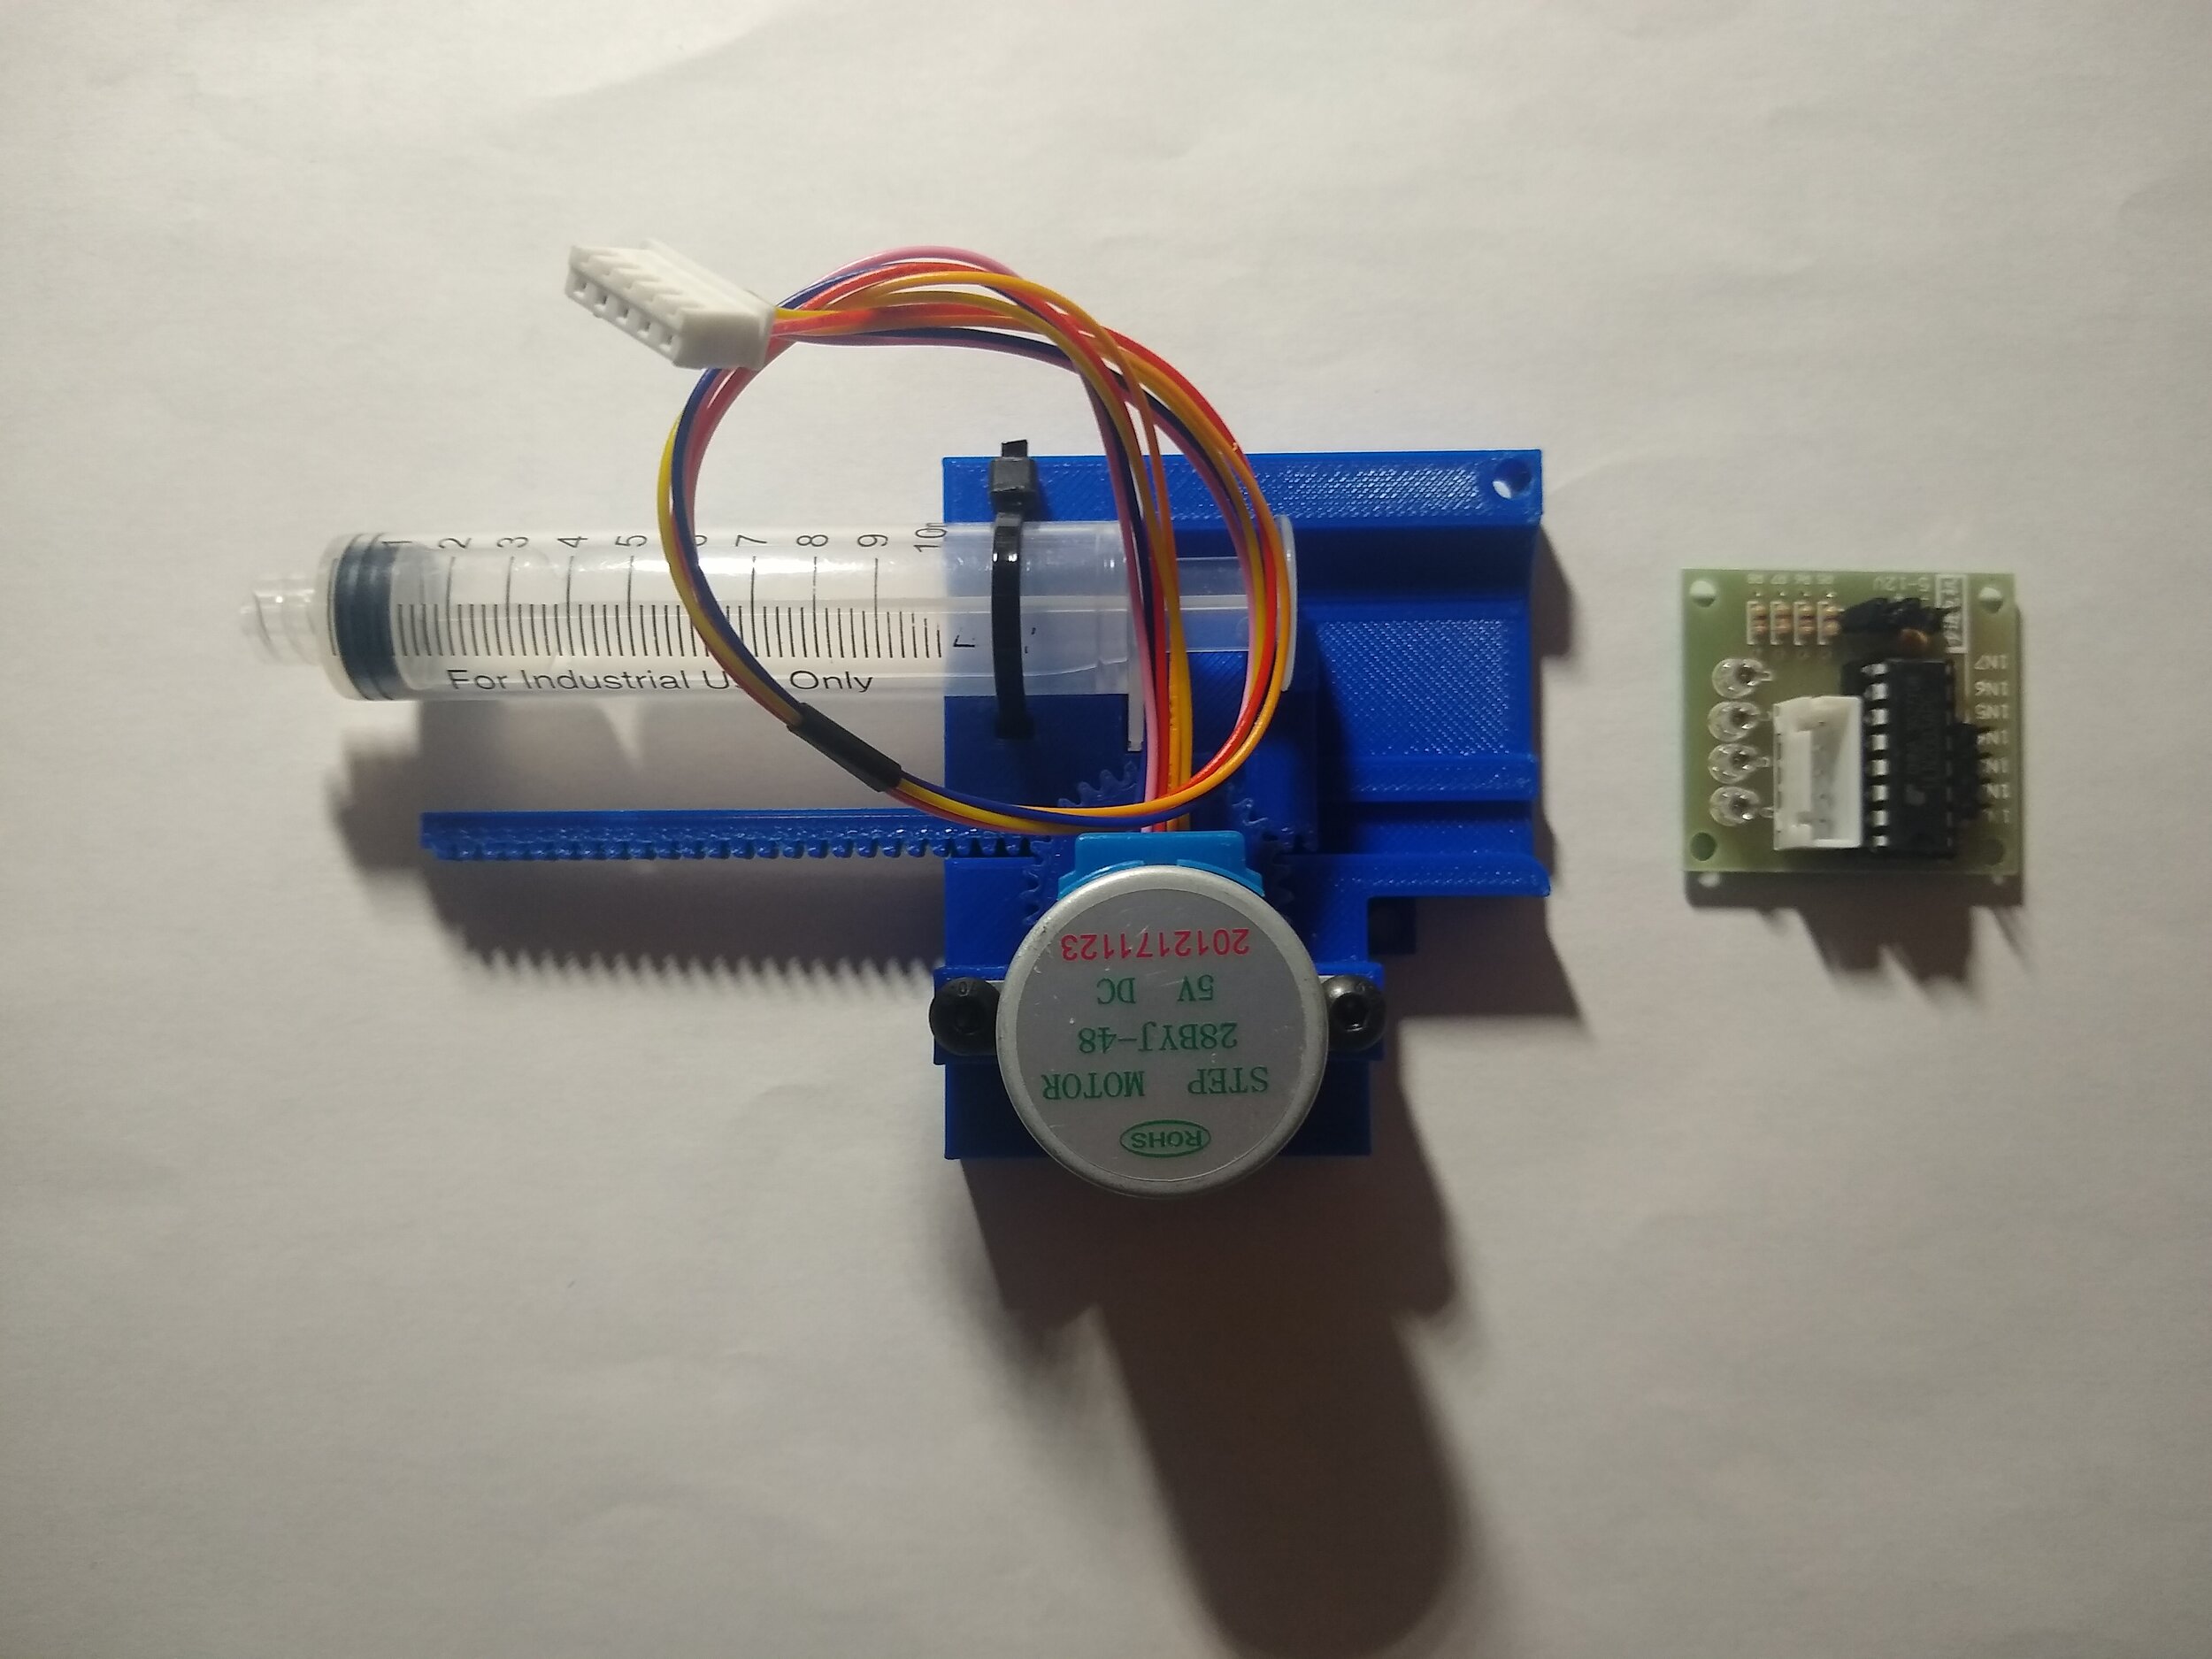
28BYJ-48 Stepper Motor
ULN2003 Driver Board
ESP32 Arduino - https://www.amazon.com/HiLetgo-ESP-WROOM-32-Development-Microcontroller-Integrated/dp/B0718T232Z
Assorted electronic components
Assorted metric screws, washers, and nuts
Basic tools and equipment for electronics (IE: soldering iron)
Assorted misc. items
Printer Settings:
Sliced using Ultimaker Cura 4.10.0
Filament: eSUN PLA PRO (PLA+) 3D Printer Filament, Dimensional Accuracy +/- 0.03mm, 1kg Spool, 1.75mm, Blue
Standard Quality - Resolution: 0.20mm
Infill: 50% for all components, 100% infill for arm
Supports: tree, 45% overhang, zigzag pattern
Extruder Temperature: 215°C
Bed Temperature: 60°C
NOTE: See original upload for printing parameters
Components and STL Files:
There are four components which need to be 3D printed for this syringe pump:
The files used for the print in this post were found and retrieved from an upload by Linus Meienberg on Thingiverse.
The files can be found via the following link: https://www.thingiverse.com/thing:2797132/files
Note: Arm is printed with 100% infill, all other components are printed with 50% infill.
The electronic button components can be found via the following link: https://www.thingiverse.com/thing:4827141
Assembly:
The assembly of the electronic components will not be detailed in this post, as there are a multitude of ways to configure the electronic components based on user preference and desired function.
In this post, the electronic controls of the syringe pump were kept simple and utilized only two buttons; one which draws the plunger backward and one which pushes the plunger forward. See the original upload for the electronic button components for specific details (https://www.thingiverse.com/thing:4827141).
View the original upload on Thingiverse (https://www.thingiverse.com/thing:2797132) for assembly instructions. The 3D printed mechanical components for the syringe pump were easy to assemble and required no modification.
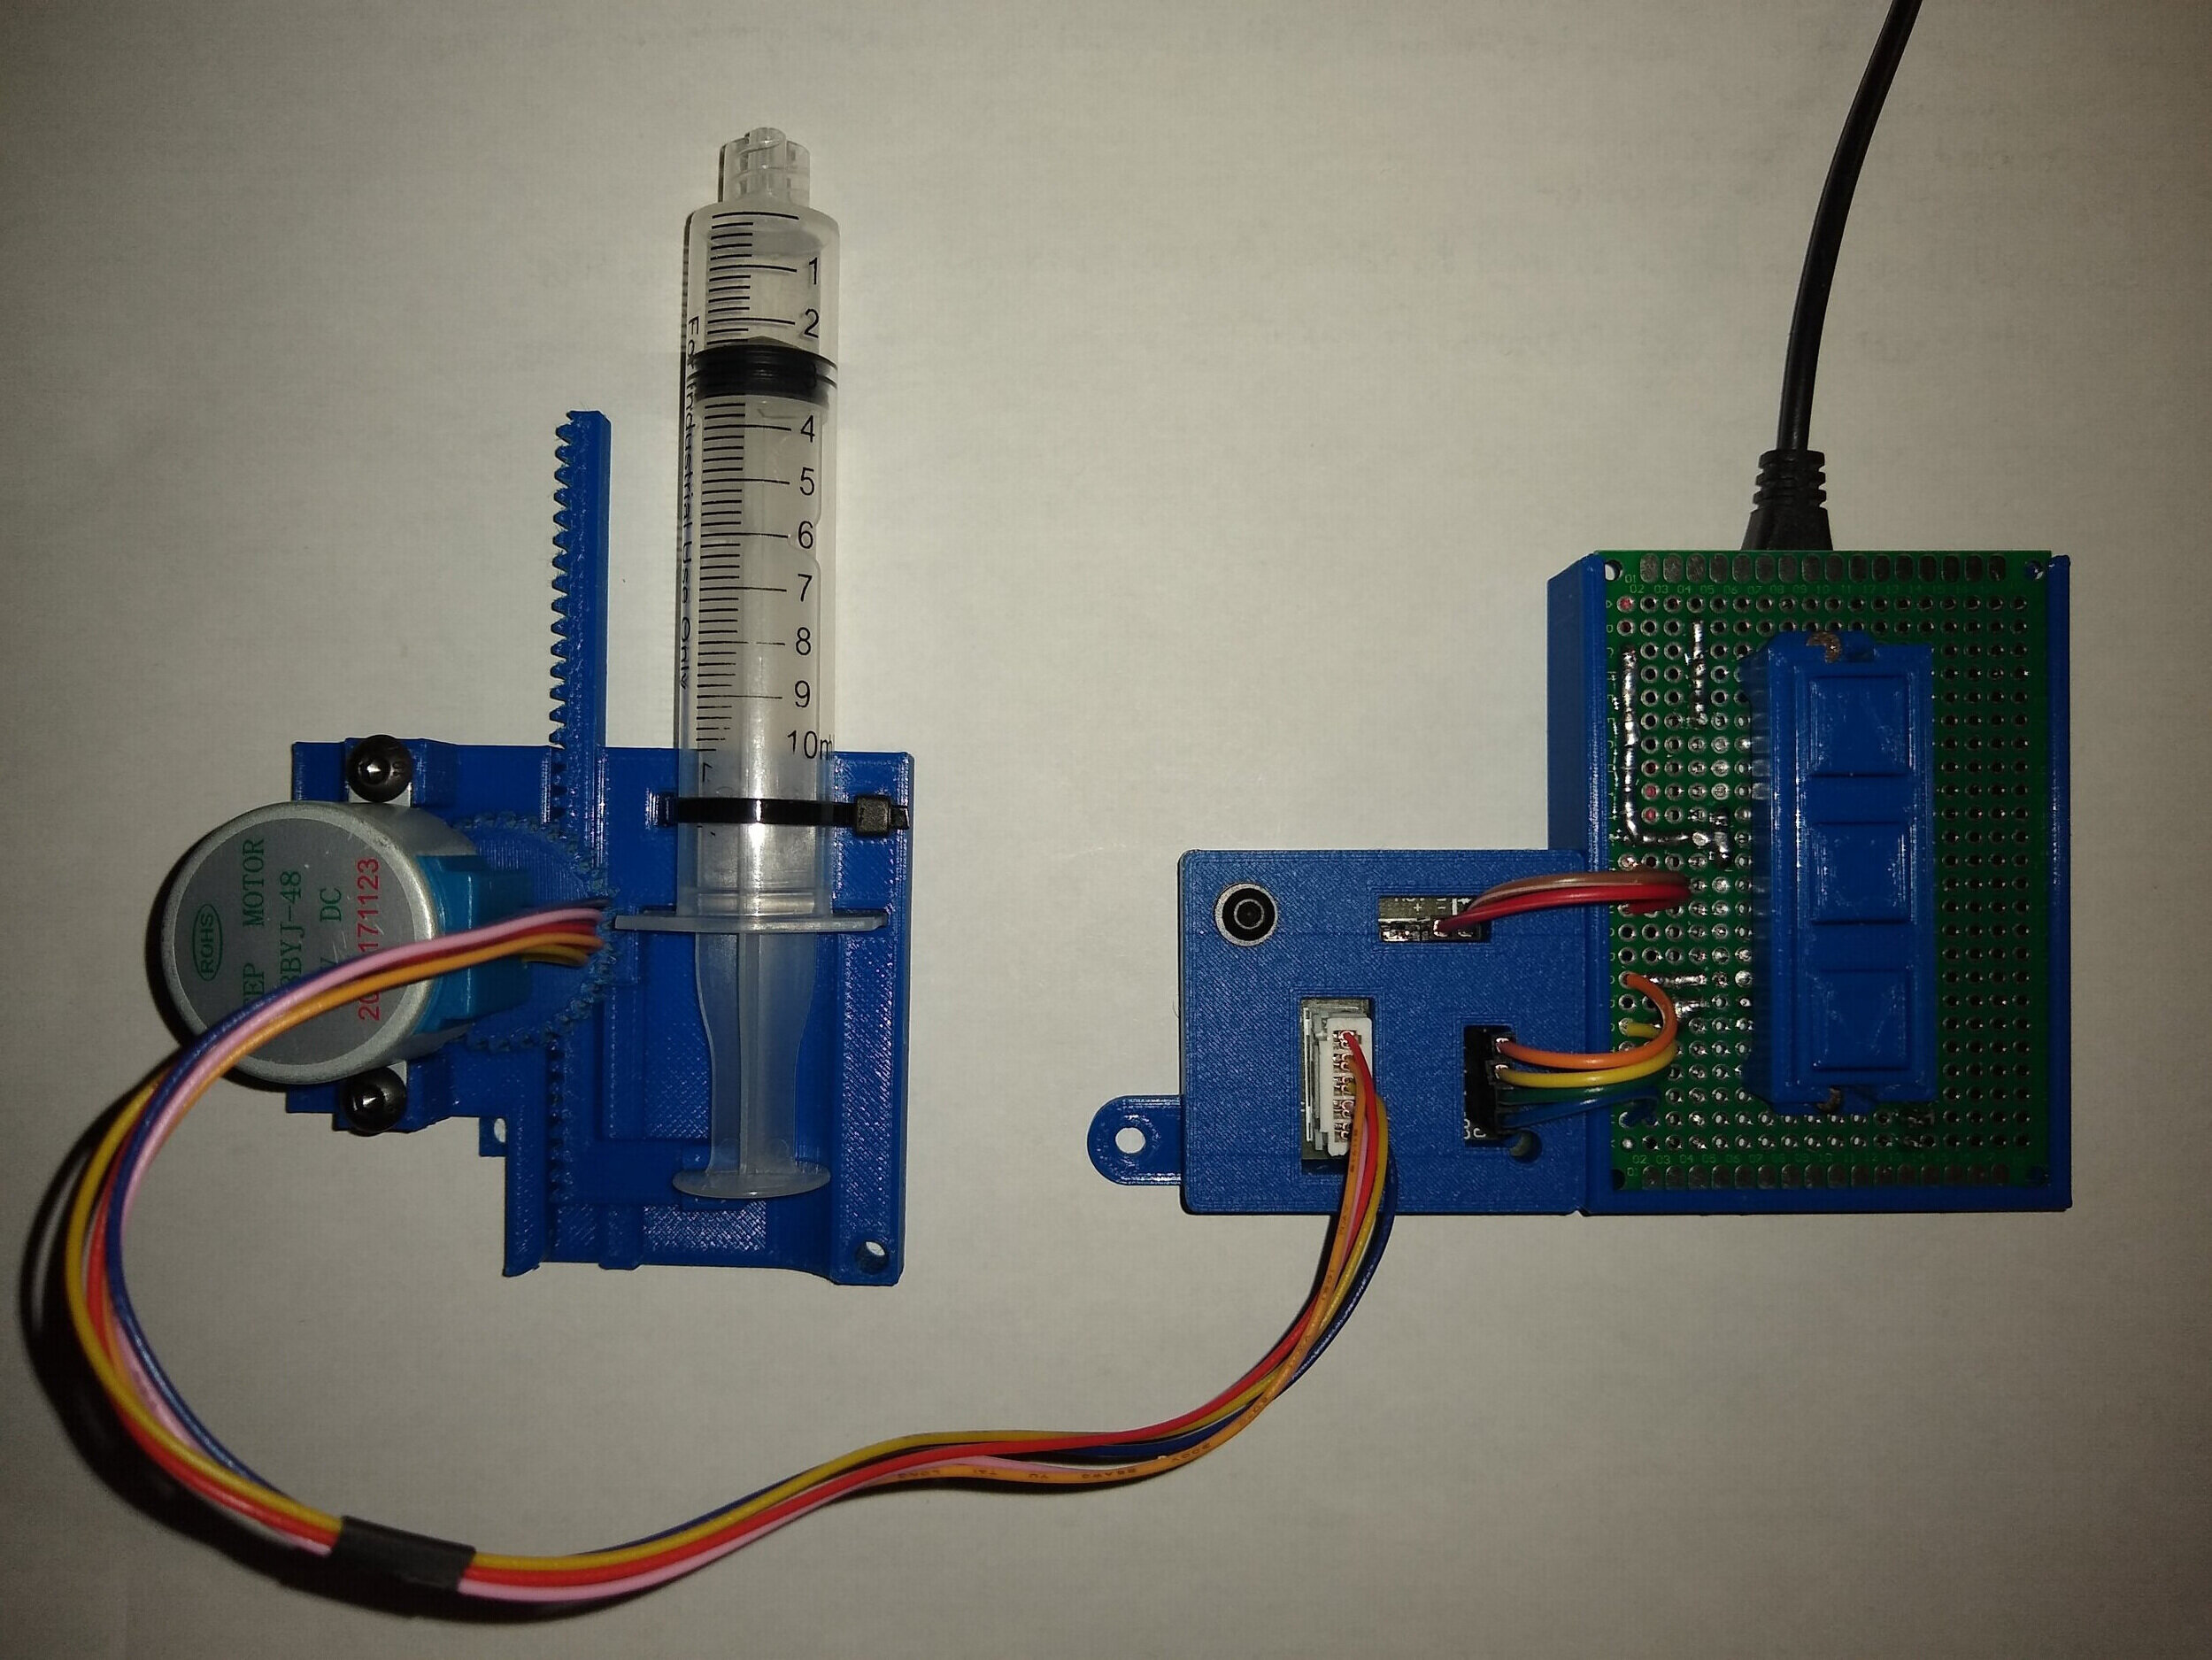
Custom 3D printed parts were designed to house the ULN2003 Driver Board and finished Arduino-PCB circuit board.


Once the syringe pump and the corresponding electronic components are assembled, the stepper motor is connected to the driver board via the 5 pin coil.
The apparatus requires a 5V power source, which can be powered directly via the micro USB port on the ESP32 Arduino board or any suitable power inlet soldered onto the PCB board.
The syringe pump is very easy to operate: the electronic controller has a forward and reverse button, which dispense the liquid and withdraw the liquid, respectively. Simply put, pressing either button causes the mechanical components to push the syringe plunger forward or pull it backward. If one of the buttons is held down, the syringe pump will continually and smoothly dispense or withdraw the liquid at a constant rate. Therefore, the mechanical components of the pump only operate when a button is pressed or held down.


Discussion and Performance:
This simple and easy-to-construct design performed much better than initially expected. The electronic components were designed to be simple and user friendly as a proof of concept. The Arduino ESP32 board offers seemingly infinite possibilities, therefore the functions of this syringe pump can be expanded as needed. This first syringe pump design was very smooth and worked great. With the current configuration, it can deliver 0.2mL aliquots of liquid reliably by simply clicking the button. When the button is held down, one can dispense the entire contents of the syringe smoothly and at a constant rate. For proof of concept purposes, the simplicity of the electronic controls and the low level of precision works just fine. The great thing about using an Arduino ESP32 is that it can be fine tuned in the future and the parameters can be customized to fulfill almost any experimental task.
Extension:
A remix of the original design was constructed to test the feasibility of this slightly different syringe pump. This design was uploaded to Thingiverse by michalow204 . This upload can be found via the following URL: https://www.thingiverse.com/thing:3394585. This design was printed using PETG and the print setting were changed to accommodate the different filament type. The same custom stepper motor, driver board, and Arduino unit were used to power and control this design.
Printer Settings:
Sliced using Ultimaker Cura 4.10.0
Filament: OVERTURE PETG Filament 1.75mm with 3D Build Surface 200 x 200 mm 3D Printer Consumables, 1kg Spool (2.2lbs), Dimensional Accuracy +/- 0.05 mm, Fit Most FDM Printer, Space Gray - https://www.amazon.com/OVERTURE-Filament-Consumables-Dimensional-Accuracy/dp/B07PGXY9Z3?th=1
Standard Quality - Resolution: 0.20mm
Infill: 25% for all components, 100% infill for arm
Supports: tree, 45% overhang, zigzag pattern
Extruder Temperature: 245-250°C
Bed Temperature: 80-85°C
Components and STL Files:
There are five components which need to be 3D printed for this syringe pump:
The files used for the print in this post were found and retrieved from an upload by michalow204 on Thingiverse.
The files can be found via the following link: https://www.thingiverse.com/thing:3394585/files
Note: Arm is printed with 100% infill, all other components are printed with 25% infill.


Performance:
This design worked well, but not as well as the original 3D printed syringe pump design, in my opinion. It is much easier to swap out syringes in this design, it is easier to mount the apparatus vertically, and it is more compact. However, the extended length of the base on the original design helps to stabilize the arm and prevents it from becoming detached from the syringe plunger flange. Furthermore, when the syringe is drawn past ~9.5 mL in volume, it becomes unstable and the syringe plunger flange can easily detach. Several simple solutions can be employed to prevent the flange from becoming detached from the arm, such as the use of a rubber band or bread tie. Either way, this is a cool design that works fairly well and gets the job done. I think a few minor improvements could make this design optimal for practical use.
References:
Acknowledgments: We greatly appreciate the help of our collaborators who made this project possible!
Update: A 5V power adapter was added to the electronic controls. We hope to make a more sophisticated syringe pump in the near future and test the utility of the apparatus in organic synthesis.
